
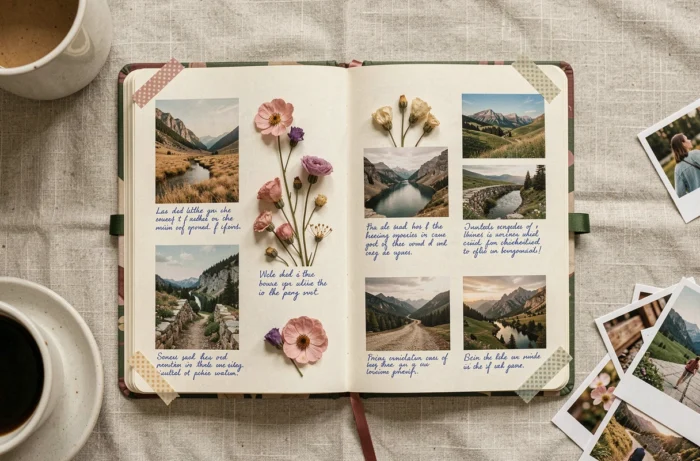
A printed travel journal is a bound book that brings together photos, short texts and graphic elements collected during a trip, then laid out and printed after returning home. Making one involves three distinct stages: collecting raw material on location, sorting and organizing it after the trip, and choosing a print format suited to the images and the story.
Metadata embedded in digital photos (GPS coordinates, date, camera model) pose a real privacy concern as soon as a journal is shared or lent—an aspect rarely covered in online tutorials.
Photo metadata and privacy in a printed travel journal
Every photo taken with a smartphone contains EXIF metadata. This includes the GPS coordinates of where the photo was taken and its precise timestamp. On a screen, this data remains invisible. But if a printed journal is scanned or its source files are shared, it becomes readable again.
The risk is not limited to digital files. An overly specific caption beneath a photo (“Fatima’s patio, village of X, National Road Y”) could reveal a private home or an address that the person photographed did not want made public. Visually, clues such as a street number, license plate or school uniform can make it possible to locate and identify people without their consent.
Before sending a file to print, take these three precautions to reduce the risk:
- Remove EXIF metadata from photos using a dedicated tool (most operating systems offer this option in the file properties) before importing them into the layout software.
- Replace precise place names in captions with broader geographic descriptions: “southern coast of Morocco” rather than a village name, or “covered market in the old town” rather than the exact address.
- Blur or crop the faces of people who have not given consent, license plates and documents visible in the background, directly in the photo editor before laying out the pages.
This cleanup step also applies when the journal is intended for strictly personal use. A house move, a family loan or a later scan could put this data back into circulation years down the line.

Collecting raw material during the trip: notes, photos and documents
A successful printed journal draws on a variety of material collected on location. Photos provide the foundation, but they are not enough to convey the context. A hybrid journal combines handwritten notes taken during the trip (impressions, names, routes, conversations) with photos sorted after returning home.
This approach, documented in particular by the Visiter l’Afrique guide, distinguishes between two stages: quick capture on location and careful editing after returning home. It offers two benefits. Notes taken in the moment preserve details that memory can erase within a few weeks: the name of a dish, the color of a wall, a price listed at a market. Photos, meanwhile, provide the visual framework.
Beyond photos and notes, some physical documents can enrich a journal: transport tickets, restaurant business cards, local product labels, photocopies of passport stamps. For a trip to Provence, for example, the detailed itineraries offered by the Provence Unpacked guide can serve as source material, with village names and routes to annotate along the way.
You don’t need to collect everything. Five to ten photos per day of travel, supplemented by a few handwritten lines, provide enough material for four to six printed pages.
Sorting and layout: organizing your memories before printing
Sorting is the step that turns a folder of photos into a visual story. Two organizational approaches work well for a travel journal:
The first follows the chronology of the trip. Each two-page spread covers a day or half-day. This structure is easy to follow and put together, but it can become monotonous if the trip lasted more than a week.
The second organizes content by theme: landscapes, encounters, food, architecture. It breaks up the linear narrative and makes it possible to draw visual connections between different places. In return, it takes more work to caption the photos so readers can follow the geography of the trip.
Selecting photos for print
A printed travel journal is not a hard drive. Keeping twenty to thirty photos per week of travel is enough for a forty- to sixty-page book. Sorting involves removing duplicates, blurry photos and purely documentary shots (an information sign, a screenshot of a map).
The most reliable selection criterion is variety: each photo you keep should show something the others do not. A portrait, a wide landscape, an architectural detail and a street scene tell a richer story than four versions of the same sunset.
Paper, binding and trim areas: technical print settings
The choice of physical materials determines the final look. Two factors deserve particular attention: the type of paper and the binding method.
Matte paper reduces glare and works well for journals with lots of text. Glossy or satin paper brings out the colors and contrast in landscape photos. Paper weight affects how stiff the pages are: paper that is too thin will buckle if photos are printed full-page, while paper that is too thick will make the book heavy.
Lay-flat binding, offered by some providers such as VistaPrint, lets you run a photo across a two-page spread without losing any of it in the fold. For a mountain panorama or coastal landscape, this format changes how the image is experienced. Traditional perfect binding, which costs less, creates a dip in the center that cuts through images spanning two pages.
Trim areas and safe margins
Industrial printing involves mechanical trimming. Elements placed too close to the edge of a page may be cut off. The TripMemo guide recommends always checking that text and faces are outside the trim area, usually marked by a guide in the layout software.
Place names and captions at the bottom of the page are most at risk. Reviewing the layout on screen and zooming in on each edge takes about ten minutes and can prevent you from discovering a mistake in the printed book.
Scanning your journal to keep a copy
A printed journal is one of a kind. Water damage, a house move or simply the passage of time can damage it. Scanning the pages after they arrive creates a backup copy that you can view on screen.
A flatbed scanner faithfully reproduces the colors and textures of the paper. If you don’t have one, most recent smartphones offer a scan mode that automatically straightens photographed pages. The resulting file (a PDF or a series of images) can be stored on an external drive or an online storage service.
This digital copy has another use: it lets you share the journal without passing around the original or sending the source files, which may still contain metadata that has not been removed.

A printed travel journal is one of the few objects you can leaf through without a battery or an internet connection. Making one involves sorting, layout and technical checks before placing the order. Cleaning metadata and taking care with captions helps protect the people photographed well beyond the immediate family circle, especially if the journal changes hands one day.